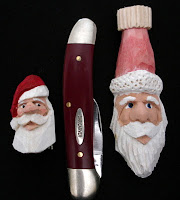
Thought he needed a little brother.
Tuesday, January 31, 2012
Thursday, January 26, 2012
Tuesday, January 17, 2012
Progress
Notice the eyes in this first photo. They are painted on, not carved. Notice also the eye area. The top of the eye area (bottom of the brow) is carved at right angles to the plane of the face. The area of the actual eye ball is flat. This is what I am attempting to move away from. I need to have an eye that is carved, not painted. I also want to do all the carving with a pocket knife.
This photo is where I am today. The eye is carved. As soon as I practice this carving technique, and can achieve consistent results, I'll move on to carving smaller eyes. My goal is to be able to carve eyes that are about half this size.
Notice the eye area in which I carved this eye. The top of the eye area/bottom on the brow no longer is carved at right angles to the plane of the face. It is angled so that I can carve the eye lid, and have more room to carve a rounded eyeball.
Thursday, January 12, 2012
Carvings Realistic Eyes
The question of the day: CAN AN OLD DOG LEARN NEW TRICKS?
And the jury is still out on this question as it relates to me learning to carve realistic eyes.
Here's the problem. This Ol' dog has spent six years whittling. When I started someone told me that I need to practice, practice, practice. This I took to heart, This might have been the only time in my life that I actually followed instructions. I started carving faces, Santa faces. I carved lots of them. I practiced, practiced, and practiced carving faces. I got it down so that I could carve them in no time at all. I've carved at least two Santa pins every day for the past several years. The eyes on these faces were an after thought, and were mainly half carved and then painted. Or they were left squinting. I have just learned that to carve realistic eyes I must alter the way that I roughed out the eye area. This means relearning how to rough out the eye area. I have to "unlearn" my old methods, before I can learn the new methods. There is an old saying................"we cannot plant new crops without first uprooting the old roots and giving the new seeds a chance, we need to unlearn before we can learn anew". Unlearning is the key. How then do we unlearn our patterns and develop new patterns?
You see my problem?
Tuesday, January 10, 2012
Ready To Learn - Eyes!
I've prepared several faces minus the eyes, in preparation for learning to carve eyes. I'm thinking this is a lot better than learning to carve eyes on the corner or flat side of wood. By preparing these faces prior to the actual eye practice, I'm hoping to maximize my learning experience.
Monday, January 9, 2012
Carving Realistic Eyes! A New Start!
Sunday, January 8, 2012
Update - Flower Girls
Thought it was time for an update. Some remember the ongoing events that I posted, concerning my neighbors (Flower Girls), and the Gnomes. I haven't been posting anything about Gnomey and the girls for many moons. As the girls got older I came to think that they no longer believed, and that they were kinda going along just "for me". You know, kids do grow up. But every now and then The girls say or do something that leads me to believe that there might be a small part of them that still believe in the Gnomes. Maybe we'll have to contrive a test of sorts.
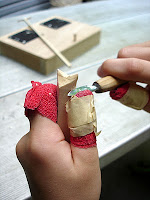
Mean while I started teaching the girls to carve.
Mean while I started teaching the girls to carve.
Thursday, January 5, 2012
Wednesday, January 4, 2012
All Failed The Test!
I either included a test in the previous postings about the summer quilt, to see how many would catch the mistake, or more likely I made a bonehead mistake. I'll let you all figger out which. The dimensions of the larger white squares are not correctly posted. They were posted as 10" x 10". And if you peeked, you'd know that they were also cut at 10" x 10". These white squares must alternate with the pieced squares. What size are the pieced squares? Well the color was pieced from five 2 1/2" strips. After the five strips were sewn with a 1/4" seam they measure 10 1/2". Thus one can easily see that they will not match up with 10" white squares.
My next quilt will use 10" white squares......
My next quilt will use 10" white squares......
Sunday, January 1, 2012
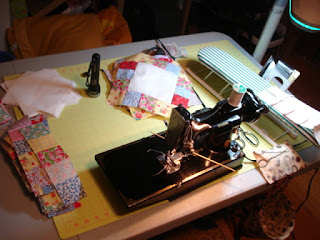
"Sweatshop" Quilt Assembly Station
I think this work station is the most efficient - at least for me. With this setup I don't have to get up from my chair. All the quilt pieces are at the ready on the left and at the top. Seams can be pressed at the right. What you can see in the top right, is the OTT LITE, which helps my tired ol' eyes see what I'm doing. Got everything I need within reach.
Subscribe to:
Comments (Atom)


